
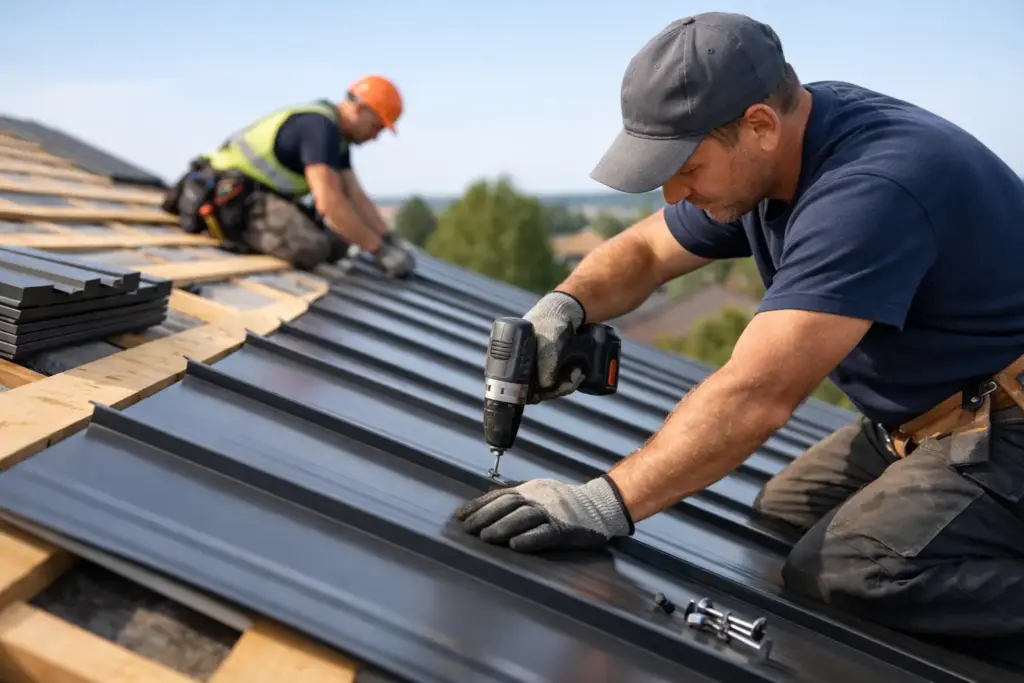
A premium metal roof does not succeed or fail at the panel. It succeeds or fails in the installation details that sit underneath it, around it, and at every transition where water, snow, wind, and temperature movement test the system. That is why the metal roof installation process matters as much as the product itself, especially in Alberta, where roofs deal with heavy snow loads, chinooks, hail exposure, and sharp seasonal swings.
For homeowners, builders, and property investors, the real question is not simply what material goes on the house. It is whether the roof system is being installed in a way that protects the structure long-term, keeps maintenance predictable, and fits the architectural standard of the property.
Why the metal roof installation process matters
Metal roofing is often marketed on lifespan, and fairly so. But long service life is not automatic. A poorly executed installation can lead to oil canning, fastener issues, ventilation problems, ice backup, noise concerns, and premature failure at seams, valleys, skylights, and penetrations.
On high-value homes and custom builds, those risks are more than cosmetic. They affect insulation performance, attic health, repair frequency, and resale confidence. A proper installation is what turns premium material into long-term building performance.
This is also where not all metal roofs are equal. Standing seam, metal shingles, and European-style metal tiles each have different attachment methods, flashing requirements, and expansion behaviour. The right process depends on the roof design, slope, exposure, and the specific system being installed.
Step 1: Site review, measurement, and system planning
Before any tear-off or delivery, the project should be planned around the house itself. Roof geometry, pitch, overhangs, valleys, dormers, wall connections, chimney details, and ventilation strategy all need to be reviewed. On acreage homes and custom residences, this stage is particularly important because roof lines are often more complex than standard subdivision construction.
This is also where the installer confirms whether the existing roof assembly should be removed fully or whether another approach is appropriate. In most premium applications, a clean substrate gives better quality control. It allows the crew to inspect the deck, correct hidden issues, and install the underlayment and attachment system exactly as intended.
Material ordering happens from these measurements, but good planning goes beyond square footage. Trim profiles, snow retention, venting components, closures, underlayment type, and custom flashing pieces all need to be coordinated in advance. Precision here reduces site improvisation later, which is where many roofing problems begin.
Step 2: Tear-off and deck inspection
The visible roof is only one layer of the assembly. Once the old roofing is removed, the deck needs to be checked carefully for rot, sagging, delamination, moisture damage, and fastening issues. If the substrate is uneven or compromised, the finished metal roof will reflect that. A clean-looking panel installed over a poor deck is still a poor roof.
In Alberta, this step often reveals issues caused by past ice damming, inadequate ventilation, or leakage around penetrations. Those problems need to be corrected before installation continues. This can include replacing sheathing, reinforcing weak areas, and ensuring the deck is flat enough to support the specific metal profile.
The goal is simple: start with a stable, dry, consistent base. Premium roofing systems depend on it.
Step 3: Underlayment and moisture protection
Once the deck is ready, the roof receives its moisture protection layers. This stage is one of the least visible and most important parts of the metal roof installation process. Underlayment is what helps protect the structure if wind-driven rain, ice backup, or condensation challenge the outer roofing layer.
The exact assembly depends on the roof system and the project conditions, but this generally includes high-performance underlayment, ice and water protection in vulnerable areas, and careful treatment at eaves, valleys, penetrations, and transitions. The cold climate matters here. Snow loads and freeze-thaw cycles create very different demands than a mild-weather installation.
This is also where ventilation planning and roof edge detailing begin to matter. Eave conditions, intake and exhaust balance, and the way the roof assembly manages moisture movement all affect long-term performance. A metal roof should not trap problems below the surface.
Step 4: Layout, starter details, and edge preparation
Before the main panels or tiles go on, the roof needs to be laid out accurately. Straight lines matter. Square alignment matters. Edge details matter. On visible architectural roofs, even small inconsistencies can become obvious from the ground.
Starter strips, drip edge, battens or strapping where required, and perimeter preparation are installed based on the chosen system. This stage sets the rhythm for the rest of the roof. If alignment is off at the start, the error carries through every course and every trim connection.
This is one reason experienced metal installers work differently from general roof crews. Metal roofing demands tighter tolerances, cleaner sequencing, and more planning around thermal movement and custom flashings.
Step 5: Panel or tile installation
This is the stage most property owners picture when they think about roofing, but it is only one part of the full process. The installation method depends on whether the system is standing seam, stamped metal tile, or another premium profile.
For standing seam roofs, panels are positioned and attached using the system’s specified clips or fastening method, allowing for controlled expansion and contraction. This movement is not a minor issue in Alberta. Temperature swings can be significant, and the roof assembly must accommodate that movement without stressing seams or distorting the finished appearance.
For metal shingles or European-style tile systems, the sequencing is different, but the principle is the same. Courses need to stay true, attachment needs to follow manufacturer standards, and every overlap or interlock needs to be installed with weather resistance in mind.
At this stage, quality crews also protect the finish carefully. Scratches, metal debris, and careless foot traffic can affect appearance and corrosion resistance over time. Premium roofing requires disciplined site handling, not just fast installation.
Step 6: Flashing, valleys, penetrations, and transitions
If there is one area that separates a lasting roof from a short-lived one, it is flashing work. Roof-to-wall transitions, chimneys, skylights, plumbing penetrations, valleys, and vent details are where water problems usually start. These areas require precision fabrication and proper sequencing, not sealant-heavy shortcuts.
A well-installed metal roof relies on formed metal flashings that direct water where it needs to go. Sealants can support the assembly, but they should not be the whole strategy. In a climate with UV exposure, snow pressure, and freeze-thaw cycling, overreliance on exposed sealant is a weak point.
This is especially relevant on custom homes with multiple rooflines and architectural features. The more complex the roof, the more valuable skilled flashing work becomes.
Step 7: Trim, snow management, and finishing details
Once the field roofing is complete, the finishing components go on. Ridge caps, gable trim, closures, and edge details need to be installed tightly and cleanly. These are not just cosmetic pieces. They protect openings, complete ventilation pathways, and help the roof resist wind uplift.
For Alberta properties, snow retention often deserves specific attention. Metal roofs shed snow efficiently, which is an advantage, but uncontrolled shedding can create safety and drainage concerns over entries, walkways, lower roof sections, and landscaping features. Whether snow guards are needed depends on roof pitch, layout, climate exposure, and how the property is used.
This is one of those areas where it depends. Not every roof needs the same snow management approach, but every roof should have that question addressed before the project is finished.
Final inspection and cleanup
The last stage should never feel rushed. A proper final inspection checks panel alignment, seam quality, flashing integrity, trim fit, fastener placement where applicable, and the condition of the finish. Debris and metal filings need to be removed so they do not stain or affect the coating.
This is also the right time to confirm that vents, drainage paths, and transitions are performing as intended. A clean handoff matters because it gives the owner confidence that the project was completed with the same discipline it was sold with.
For clients investing in premium roofing, the process should feel controlled from start to finish. That is the standard Hazinasky Roofing LTD. is built around.
What property owners should watch for
If you are comparing contractors, ask how they handle deck preparation, flashing fabrication, thermal movement, ventilation, and snow management – not just what panel they install. Material quality matters, but installation discipline is what protects the investment.
The best metal roof installation process is not the fastest one. It is the one that accounts for climate, structure, detailing, and long-term service life without cutting corners to save a day on site.
A metal roof should look sharp on day one. More importantly, it should still be doing its job after years of Alberta weather. That outcome starts well before the final panel goes on.