
A metal roof can shed a deep layer of packed snow in one sudden release. On an Alberta acreage home, that force can damage eavestroughs, crush landscaping, block exits, or create a serious hazard over a driveway or entry. Knowing how to install snow guards properly is not about adding a few clips near the edge of the roof. It is about designing a retention system that suits the roof profile, slope, snow load, and areas below.
Snow guards work best when they are planned with the roofing system, not treated as an afterthought. Placement, attachment method, and spacing all affect whether the system protects the property or creates concentrated stress where it does not belong.
Start With the Roof System and Snow Load
Before choosing snow guards, identify the exact metal roof profile. Standing seam panels, metal shingles, European-style metal tiles, and exposed-fastener panels each require a different attachment approach. A snow guard designed to clamp onto a standing seam must not be screwed through that seam. A bracket intended for a structural fastening point cannot simply be attached to thin sheet metal.
Alberta conditions add another layer of planning. Snow accumulation varies across the province, but wind-packed snow, freeze-thaw cycles, and long roof runs can create significant sliding loads. A steep roof may shed snow more aggressively, while a low-slope roof can hold snow longer before releasing it in dense, heavy sections.
The key question is not simply how much snow falls. It is how much snow can collect above a snow guard row, how far it can travel before reaching that row, and what needs protection below. Roof length, pitch, panel width, roof valleys, dormers, and heated areas all influence the final layout.
Choose the Correct Type of Snow Guard
There are two common approaches: individual pad-style guards and continuous rail-style systems. Both can perform well when specified correctly.
Individual guards are installed in a staggered pattern across the roof. They break up snow movement in smaller sections and can suit certain metal tile, shingle, and panel profiles. Their effectiveness depends heavily on correct spacing and on fastening them into approved structural locations.
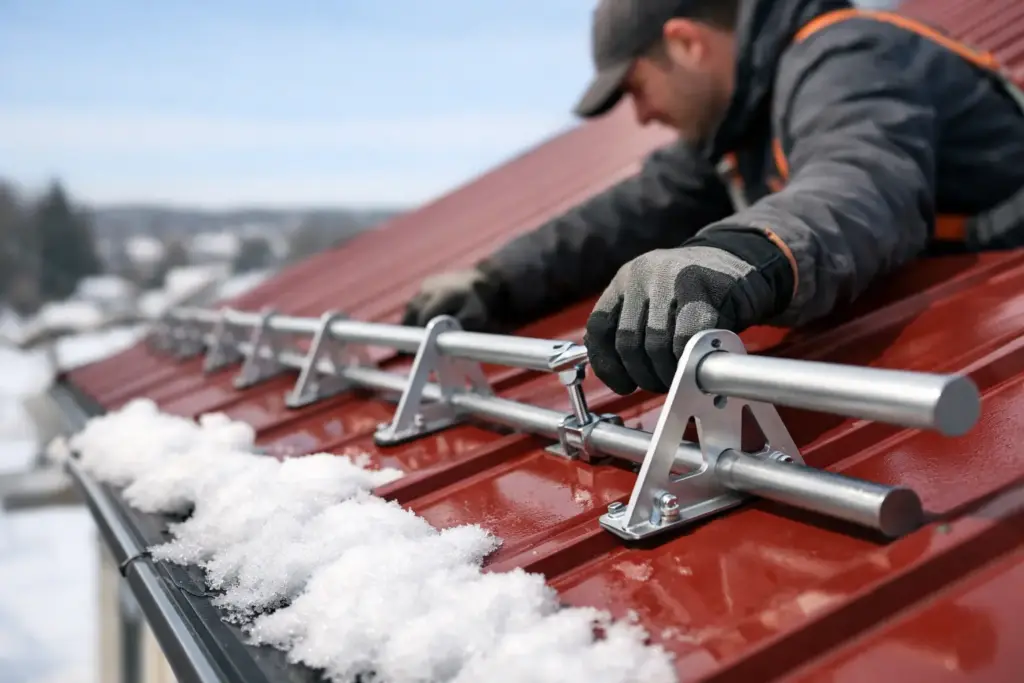
Continuous snow rails use brackets with a horizontal pipe, bar, or rail. They provide more uniform retention across the roof and are often the stronger choice for long standing seam roof runs, entryways, walkways, and areas where a controlled snow release matters. They also create a cleaner architectural appearance on premium residential projects when colour-matched to the roof.
For standing seam metal roofing, non-penetrating clamp-mounted systems are typically preferred. Properly engineered clamps secure to the seam without putting holes through the roof panels. This preserves the weathering surface and allows the roof to expand and contract with temperature changes.
Avoid adhesive-only guards for primary snow retention in demanding conditions. Some adhesive products have limited applications, but they should not be relied on as the main defence against heavy, repeated snow loads on an Alberta roof.
Plan Where Snow Must Be Controlled
Snow guards do not always need to cover every roof plane. They are most valuable above areas where falling snow creates risk or expense. That commonly includes front and rear entrances, garage doors, decks, lower roof sections, utility equipment, gas meters, air-conditioning units, sidewalks, and heavily used paths.
Do not install them too close to the eave. A snow guard row placed at the very bottom of a roof can overload the panel edge and eavestrough area. The correct position is generally higher on the roof, determined by the manufacturer’s engineering guidance and the roof structure beneath. On longer slopes or high-snow-load areas, multiple rows may be required.
Valleys deserve special attention. Snow often accumulates and compacts in these zones, producing concentrated loads that are not comparable to an open roof field. A standard layout may not be adequate near a valley, roof transition, or location where two roof planes feed into one area.
Tools and Materials for a Proper Installation
The specific tools depend on the snow guard system, but a professional installation typically requires the following:
- Manufacturer-approved snow guards, rails, brackets, clamps, and fasteners
- A tape measure, chalk line, and straight edge for accurate layout
- A calibrated torque wrench or drill with the correct torque setting
- Approved sealant where a penetrative system requires it
- Fall-protection equipment, roof anchors, and non-marking footwear
- The roof and snow guard manufacturer’s installation instructions
Do not substitute generic screws, clamps, or rails because they appear similar. Snow guard components are engineered as a system. Mixing brands or using unapproved hardware can reduce holding strength and may affect roofing warranty coverage.
How to Install Snow Guards on Standing Seam Metal Roofing
Standing seam installation is often the most straightforward when the correct clamp-on system is selected, but precision still matters. Begin by confirming the seam type, seam height, panel width, and roof gauge. Not every clamp fits every standing seam profile.
Mark the first bracket row using a level chalk line or layout line that runs parallel to the eave. Consistent alignment matters for both appearance and load distribution. Brackets should be positioned according to the approved spacing schedule, not by visual estimate.
Set each clamp over the standing seam and tighten the set screws to the manufacturer’s required torque. Under-tightening can allow movement under snow load. Over-tightening can distort the seam, damage the coating, or restrict thermal movement. A calibrated torque setting is a small detail with major long-term consequences.
Once the brackets are installed, fit the rail or pipe through the bracket openings. Secure it with the supplied locking hardware and check that each connection is fully seated. If the system uses multiple rail sections, make sure the joints are supported as specified and that rail ends are capped where required.
Step back and inspect the complete row. Brackets should be consistent, seams should not be visibly deformed, and the rail should remain straight. A crooked snow rail is not only an appearance issue. It can indicate uneven bracket placement or inconsistent fastening.
Installing Snow Guards on Exposed-Fastener Panels or Metal Tiles
For exposed-fastener metal roofing, snow guards are usually attached through the panel into a structural support location, often a purlin, batten, or roof framing member. Fastening into sheet metal alone is not acceptable for meaningful snow retention.
Locate the structural support before drilling. This may require reviewing installation drawings, measuring known framing intervals, or carefully verifying the substrate from inside the attic where possible. Drill only where the snow guard manufacturer permits, then install the specified gasketed fasteners and sealant detail.
With metal tiles or shingles, use a system designed for that profile. Some products attach beneath an overlapping course, while others fasten through defined high points or structural zones. Improvised placement can interfere with water flow, create exposed penetrations, or crack a coated finish.
This is where experienced roofing judgment matters. A snow guard that looks secure on the surface may still be poorly connected to the roof assembly below.
Spacing Is an Engineering Decision
There is no universal spacing rule for snow guards. A short roof over a side door may need a single well-designed row. A broad, steep roof over a main entrance may require closer bracket spacing, heavier rails, or additional rows.
Use the snow guard manufacturer’s snow-load tables for the specific product and roof type. These calculations generally account for roof pitch, rafter length, panel configuration, design snow load, and the number of rows. If the project has unusual geometry, long panel lengths, a high-elevation location, or a critical pedestrian area below, request a project-specific layout.
Adding fewer guards to save money is a poor trade-off. It can cause the retained snow load to concentrate on too few components, increasing the chance of failure. Adding guards without a plan can also be a problem if their placement restricts drainage or conflicts with roof details.
Safety, Maintenance, and When to Call a Specialist
Working on a metal roof carries real fall risk. Metal surfaces can become slick from frost, dust, moisture, or loose granules, and a roof that looks dry from the ground may still be hazardous. Do not install snow guards in icy conditions, high winds, or when safe fall protection cannot be established.
After installation, inspect the system at least once a year and after severe weather. Look for loose brackets, shifted rails, damaged coatings, distorted seams, or fasteners that have backed out. Remove debris that prevents drainage, but do not chip at ice with tools that can damage the roof finish.
For new construction and major reroofing work, snow retention should be part of the roof design from the beginning. Hazinasky Roofing LTD. treats these details as part of a complete exterior system because a premium metal roof should manage snow, water, wind, and appearance together.
A properly designed snow guard system lets snow leave the roof in a controlled way, on the roof’s terms rather than all at once over the place where your family, guests, vehicles, and investment need protection.